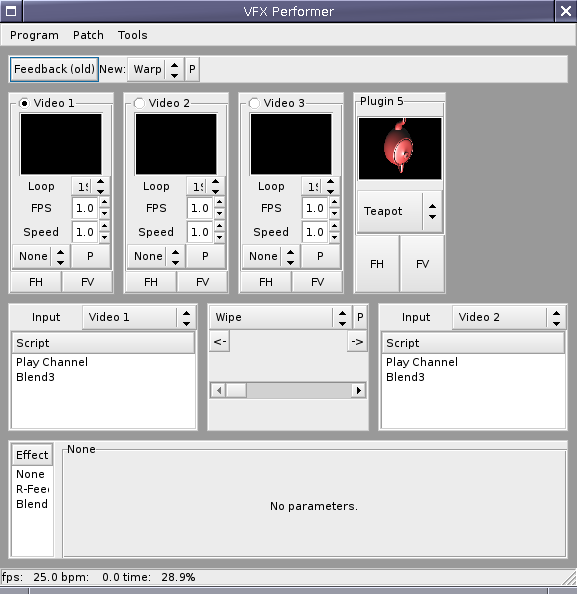
The main Performer window
Here's a very quick whirlwind tour of the most important features of the Performer. Working through this Getting Started guide should give you enough basic familiarity with the controls to be able to play around with the program and create some interesting effects.
First of all, grab the Starter Pack: a small collection of sample video loops. We're about to use it to demonstrate the basic features of the Performer. Download it and unpack it in your home directory somewhere.
Start vfx-performer and take a quick look at the
main "VFX Performer" window. The main things to note are, from top
to bottom:
There's also a smaller window titled "VFX Output", which will just be black at the moment.
Start by loading the patch from the Starter Pack. (A patch is a collection of video clips which you can play in the Performer.) Click on "Patch" -> "Open" and open "getting-started.p". A new window appears with 24 square slots, 7 of which contain thumbnails of video clips.
Click on one of the clips in the patch window. It starts to play in both the "Video 1" input channel and the "VFX Output" window. Click on another clip to switch to that one instead.
You can also pick a clip with the keyboard by pressing the associated key. (You need to be typing into the patch window for this to work; pressing Q, etc in the main Performer window won't work.)
Switch to the second input channel (by clicking on its title) and start another clip. This one appears under "Video 2" but doesn't show up on the output. Click on the horizontal crossfader in the middle of the window and drag it to the right to make Video 2 appear instead of Video 1.
Use the drop-down box above the crossfader to choose between the different types of transition. "Wipe" and "Dissolve" are available by default. The "Input" drop-downs to the left and right of the crossfader select which input channel will appear when the crossfader is on that side; set them to "Video 3" or "Plugin 5" to make the other input channels visible.
The feedback loop makes the previous frame of output available as an input for the next frame.
Move the crossfader to the far left and get a clip playing. Set the right hand "Input" drop-down to "Feedback" and move the crossfader to the right. The clip freezes, because with nothing but feedback, the same frame is repeated over and over. Move the crossfader slightly to the left to blend in a small amount of the video clip and create a "motion blur" effect.
It's also possible to stretch and rotate the feedback signal. These settings are found by clicking on the "P" button at the top of the main window. It's quite easy to get vaguely Milkdrop-style effects by playing with these sliders.
A lot of VFX's most interesting effects are created using masks which allow you to use one video signal to key between two others on a per-pixel basis.
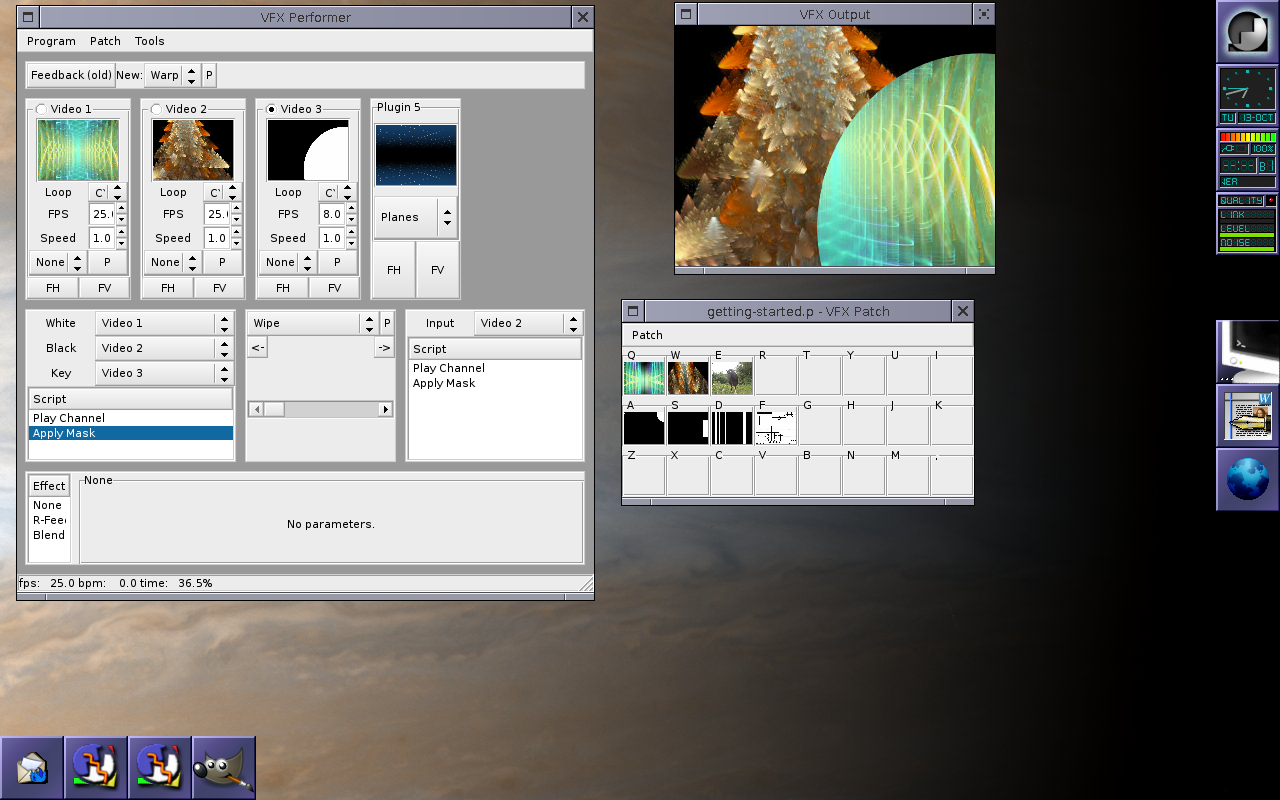
Move the crossfader to the far left. Click on "Apply Mask" in the "Script" box to the left of the fader. The "Input" dropdown is replaced by 3 selections: "White", "Black" and "Key". Set "White" to "Video 1", "Black" to "Video 2" and "Key" to "Video 3".
Start by using one of the lower four channels as the key input ("Video 3") and using the upper three in the two signal inputs. You should get something similar to the screenshot.
Try combining this with feedback by setting one of the "White" or "Black" inputs to "Feedback".
If you have a MIDI controller connected to your PC you can use it instead of the mouse to alter settings in VFX.
Right-click on a slider (such as the crossfader, or the feedback controls) and select "Learn". A small window appears that just says "Learning...". Move one of the controls on your MIDI device and the window should disappear; that slider is now bound to that control, and you should be able to see the slider moving on screen in response to your adjustments.
If it doesn't work there are two tools you can use to help you diagnose any problems. The first is the MIDI event dump window, found in the main menu bar under Tools -> MIDI Dump. This just lists any controller messages that VFX receives; moving controls should cause messages to appear in this window, even if the control isn't currently bound to anything in the software.
The second place to look is in the configuration tool, found under Tools -> Configuration. MIDI controllers are found under "Devices". Your device should be visible in the list, with a green tick mark and a status of "OK".
Select "LFOs" from the Tools menu. This gives you a regularly varying control signal that can be connected to a slider, similarly to the MIDI controllers. Right-click on a slider and select "LFO 1" - the slider now moves according to the LFO's output. Alter the amplitude, frequency and shape of the waveform with the controls in the "LFOs" window. The frequency and amplitude sliders can themselves be connected to MIDI controllers or other LFOs. (You can connect an LFO to itself if you want to, but I haven't found a lot of use for this.)
The first LFO is created for you the first time the "LFOs" window is opened. To create a second one, choose "LFO" -> "New" from the menu bar in the "LFOs" window.
The current version of the Performer is very fussy about the file format of video clips. Your clips will need to be stored as MPEG2 I-frames only in an AVI container. This is a bit of an odd format and I couldn't figure out how to get transcode or mencoder to generate it, so there's a small command "vfx-makeavi" provided to help you out.
Here's an example of using transcode to convert a video file:
$ transcode -i inputfile -Z 720x576 -f 25 -o tempfile -y mpeg2enc,null -F "3,-g1 -G1 -b8000 -q4"
$ vfx-makeavi -i tempfile.m2v -o outputfile.avi
$ rm tempfile.m2v
(Yuck. There's a half-written GUI transcoder, vfx-transcode, but it's not complete enough for real use yet. Sorry.)
When you've got a suitable video file, you can import it into a patch window by right-clicking on an empty slot and selecting "Open File...". The empty slot changes into a small thumbnail to remind you which clip is in that slot. Alternatively you can drag-and-drop video files into an empty patch slot from a file manager such as Nautilus.
The "Properties" window available from the same right-click menu lets you set the clip's base FPS and loop type (one-shot, cyclic, ping-pong).
If you have more than 24 video clips (and who doesn't?) you can create more patches from the "Patch" menu.